Starting Work On A New Allotment

Introduction
It is natural to feel excited in the moments just before seeing an allotment plot for the first time. As your allotment chairperson takes you towards your plot you are likely to pass characterful garden sheds, flower beds, weed free ground, and plots sporting the whole range of fruit and vegetables you intend to grow.
Step By Step Video
YouTube Video
You may even be imagining the taste of future harvests, or showing your plot to friends and family. But then reality hits when you see your plot for the first time! You see 150 square metres, or more, of unkept, overgrown, and derelict land …

...but do not give up! This is how nearly all allotmenters start. If a plot had not run to seed, likely as not, it would not have become available to you.
The purpose of this article is to share an approach to getting started to make the task quicker and more enjoyable.
Step 1 - Control
Starting with the good news. A wild allotment plot is telling you that your ground is fertile – a really wild plot may be the best possible one to inherit!
The first step is to stop the wildness getting any worse.
- Remove any rubbish that may be on your plot
- Cut everything down to ground level
- Cover the ground with a large tarpaulin
A good way of cutting everything down to ground level is to borrow or hire a petrol strimmer. You may find that your allotment association has one just for this reason, or can put you in contact with another plot holder who does.

Without light weeds will die, even perennial weeds with tap roots if the cover is left on long enough. The nutrients are not lost though, as the goodies contained in the plants will return to the soil as they slowly break down.
Covering the ground will immediately put you in control of your plot, allowing you to peel back the cover in stages to clear sections when time allows. Clearing a plot is exhausting work. I took the best part of 12 months before I had fully prepared all corners of my first plot.
A large tarpaulin or thick black plastic sheet is an effective way of blocking light, especially if overlaid in autumn, winter, or spring when the ground is soft, and kept on to cover the whole growing season. When the sheet is lifted, the ground should be easy to work and almost weed free.
If the ground is dry before it is covered, the effect of the plastic sheet will be the same on the weeds, but when it is removed the ground will still be dry and therefore much more difficult to work. In this situation, purchasing weed control fabric with a weave that allows water to pass through may be a better option. It may take longer for weeds to die, but it will allow rain to pass through, to soften the ground for when it will be dug over.
To stop the plastic sheet or weed control fabric blowing away, weigh it down with bricks, pegs, or any heavy items you can find nearby.
Step 2 - Digging Over
Before digging, it is a good idea to make a plan for how you want to use your space. Digging can be very hard work, but these tips can make it easier:
- Dig in wet months (spring and autumn)
Moist ground is heavier but easier to work, and you will be able to remove weeds by the root. Dry ground covered with grass can be rock hard, and almost impossible to penetrate with a spade or fork. - Dig small areas at a time
Try limiting a digging session to no more than 1 or 2 hours. - Cover freshly dug areas
If not using immediately (see step 3 below), put the cover back on freshly dug areas. Digging will bring weed seed buried in the soil back to the surface, and this may germinate. It can be demoralising for a gardener to witness their hard work become overrun with weeds before using it. - Equip yourself
Turning a wilderness into a beautiful vegetable garden is hardwork. Investing in a good set of tools (fork, spade, wheelbarrow, gardening gloves, storage box or shed etc.) does not need to be expensive, and will save time and frustration.
As any gardener will admit, digging (and weeding) is an ongoing and never ending task. Nevertheless, it will be considerably easier in the second year – provided that you remove as many of the perennial weeds as possible.
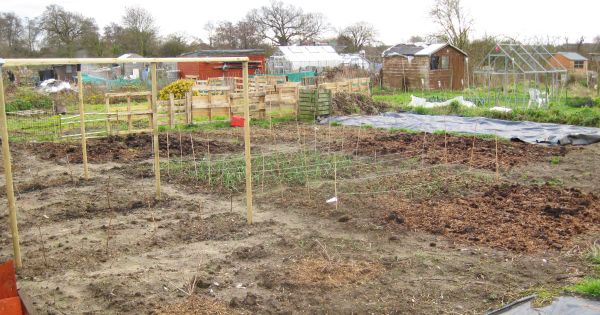
Step 3 - Starting To Grow
If the season allows, sow seeds or transplant plants as you dig. There is a huge psychological lift from seeing seeds germinate and plants maturing.
A gardener can experience a trough of despair when they realise the scale of the task in front of them. A harvest (however small) can be a great boost to morale and a reward for hard work. After a harvest, cover the ground with a mulch to enrich the soil and suppress weeds, or reuse the plastic sheet, until its next use.
Perennial Weeds
Two of the most common types of perennial weeds are:
- Plants that spread through their roots
- Plants with tap roots
Plants That Spread Through Their Roots
Couch grass is particularly common …

… as is bindweed, that looks like ivy and climbs all over plants smothering them with its flowers and leaves.

The best solution is to methodically dig them out from the soil, carefully lifting them up from beneath to unearth their root systems. Any root left behind will regrow into a new plant.
It is very difficult to remove the root systems entirely, but the weeds will effectively die away if they are constantly cleared (at least on a weekly basis in the first year).
Plants With Tap Roots
Dandelion is perhaps the most well known plant with a tap root (shown below) but you will discover many others on your allotment plot. Damp ground will help you to dig deep to remove the roots entirely.

Good luck!
Featured
The easy way for a gardener to organise their growing and discover gardening ideas.